
Yarn Number One Tutorial
On Monday, I showed some pictures of Amelia’s first birthday and showed some of the things I had made. Today I am going to show you how I made the yarn number one.
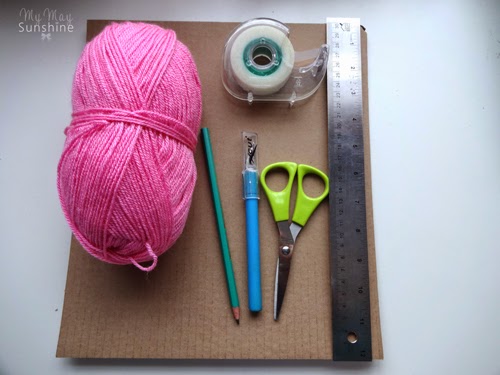
To make the number, I used some cardboard. I started off with one piece but in the end, ended up using three pieces to make it stronger. I went with some pink yarn and also gathered the tools I needed.
To make the number one shape I kind of just draw it freehand but you could print a number from word or something similar.
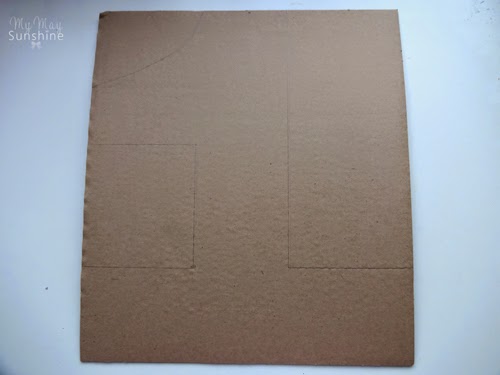
I cut out the shape with a craft knife and just made sure the edges were clean and not jagged.

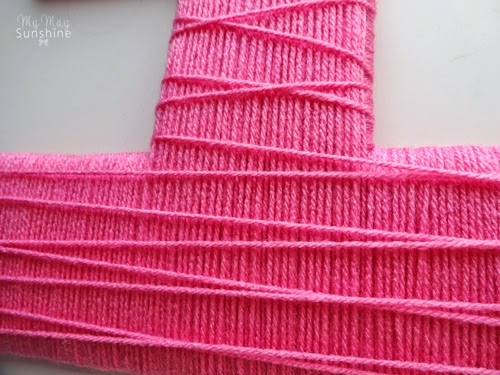
Next, I started wrapping the yarn around the cardboard making sure I taped the end to begin with.

I carried on wrapping the yarn around the cardboard until I had wrapped it around in both directions and then wrapped the yarn around a few more times a bit more randomly to secure the yarn more.
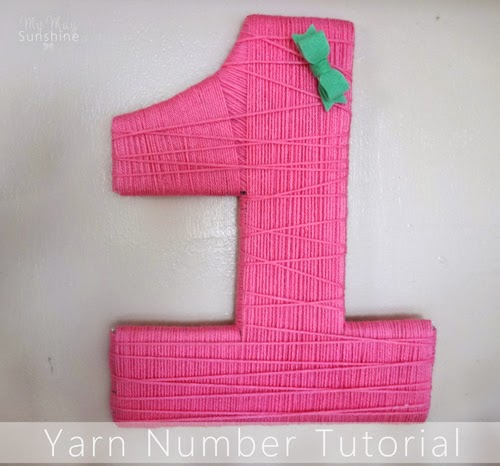
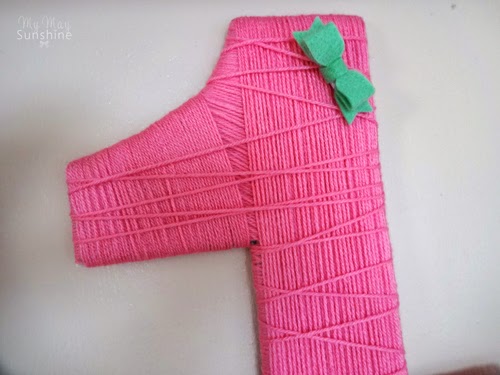
This is the finished result. I was really pleased with the way it turned out and love the colour of the yarn.

I was going to embellish the number with bows and flowers but in the end I decided to keep it simple and just added a bow clip that I had made for the girls at Christmas and I really love the mint green with the pink.
Here is the yarn number hung on the wall and I just slotted it on to a nail gently between some of the yarn.

This took me a little longer to make than I originally thought it would because I needed to add more layers of cardboard but once I had sorted out that it was really easy to wrap the yarn around.
I think this makes such a cute birthday decoration and you can keep this on a wall in the child’s bedroom, which is what I intend to do.
What do think? Is it something you would try? Let me know.

